Protective techniques
Protective techniques help you to move around safely and independently. The upper and lower body techniques can also protect your body, face and head when you need to locate objects.
These skills are most beneficial when used in a familiar indoor space and are designed to provide information about the environment around you when moving. You can combine both the upper and lower body techniques for maximum protection.
On this page
Lower body protection
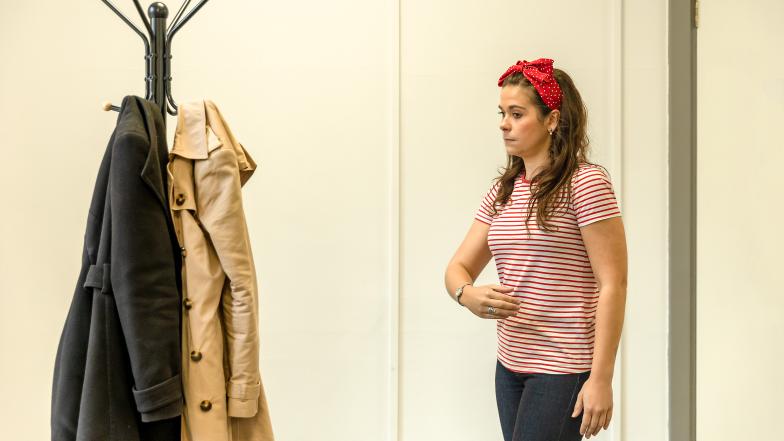
The following checklist will help you protect the mid-section of your body. For maximum protection combine both upper and lower body techniques. This technique can be used with either your left or right arms. This will only protect, the mid-section of your body.
- Extend your arm downwards and hold it diagonally across your body. Stretch your arm down as far as you can for the most protection.
- Hold your arm away from your body, rather than resting it on your stomach. This will provide you with time to react when your arm finds an obstacle.
- Turn the palm of your extended hand towards your body approximately six to eight inches from you and just below your waist with your fingers curled slightly inward.
- The back of your forearm and hand will protect the middle of your body.
- On reaching an obstacle the back of your hand should act as a ‘buffer’.
- Take time to explore the obstacle and use both hands to identify what it is.
The image below demonstrates these lower body protection techniques.
Upper body protection
The following checklist will help protect your head and the upper part of your body as you move through a space or bend to pick up an item.
- Place your hand in front of your face with your palm facing outwards. To get the correct height, place the back of your hand on your nose and then extend forwards.
- To check your hand is in the correct position blow out and you should feel your breath on the back of your hand.
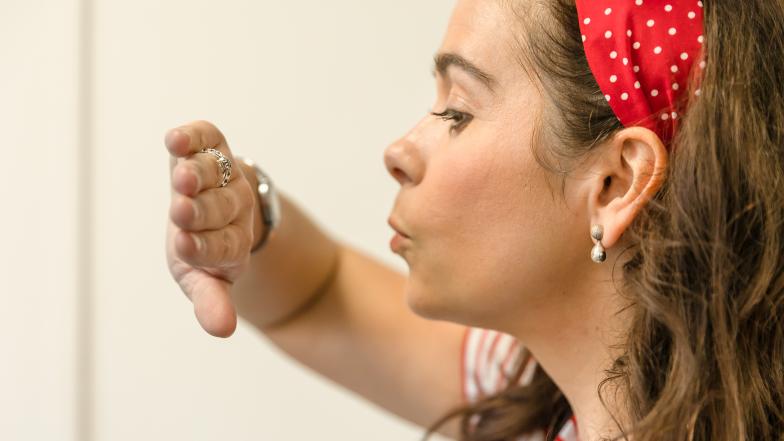
- Keep your wrist straight as you turn your palm so it faces away from your body.
- Point your fingers at a slight angle, which lets your forearm act as a buffer.
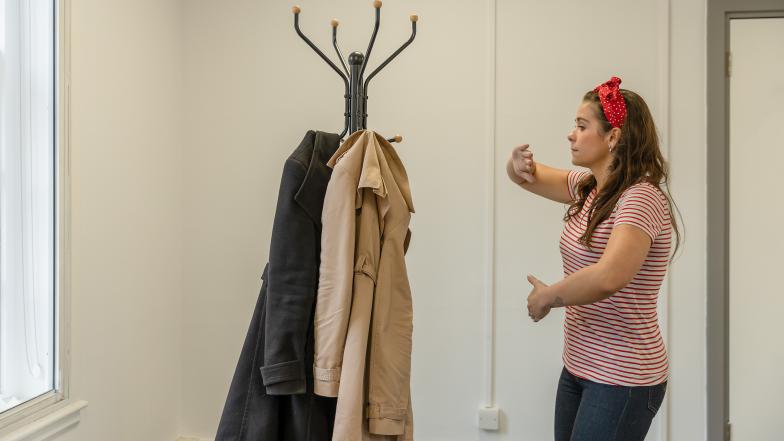
Upper and lower body protection used together
You can combine the lower and upper body protective techniques together.